An expert’s guide to nature photography around Buzzards Bay
Greg Stone often tells people that the best place to take pictures is “right where you are.” Though it might seem like you need to travel to exotic locations to capture that frame-worthy — or Instagram-worthy — image, Stone’s images from his home town of Westport show time and time again that the best nature photos are those that “see the extraordinary in the ordinary,” as he puts it.
Stone’s first experiences with photography came when he borrowed his brother’s camera, an old Brownie Hawkeye, to snap photos during and after Hurricane Carol in 1954. But he became seriously interested in nature photography, after the advent of digital cameras, when he began taking walks around nearby Gooseberry Island and wanted to begin identifying the birds he saw there.
As Stone progressed to more serious photography, he became increasingly convinced that more advanced (and expensive) gear wasn’t necessarily the way to get a good photo. He began teaching workshops emphasizing that, with a little practice, anyone can take good nature photography with whatever camera they have on hand — whether that’s a simple point-and-shoot, a fancy DSLR digital camera, or increasingly, a cell phone.
“There’s an Ansel Adams quote I use a lot, which is ‘You don’t take a photograph; you make it,’” Stone says. “What Adams is getting at is that the most important thing about the picture, far more important than the camera, is the photographer.”
Here are Greg Stone’s top tips for how to take great nature photos of your own, and some of his, and our, favorite places for nature photography around Buzzards Bay.
1. Start at home.
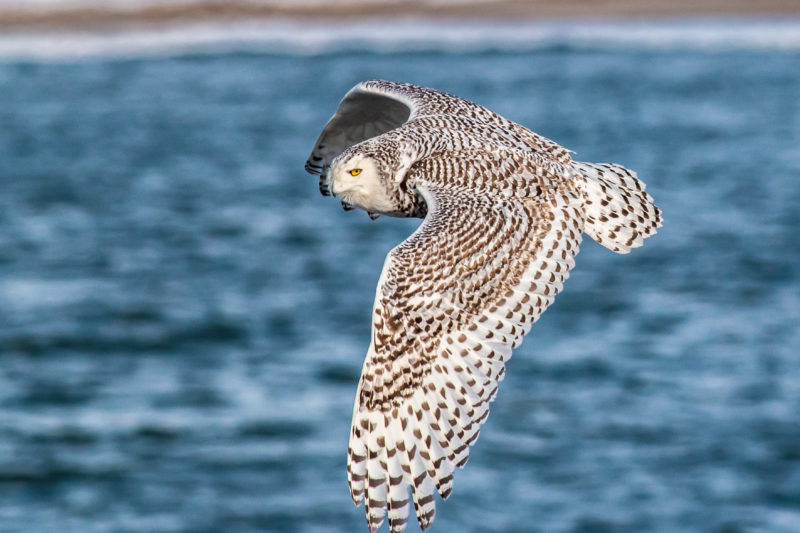
Stone has captured amazing wildlife photos, like this snowy owl at Gooseberry Island, by keeping track of when migrating wildlife move through his area. (Image: Greg Stone)
“If you really want to do nature photography well, you need to know your subject,” says Stone. “And the best way to do that is make your subject your own backyard.”
Whether that’s literally the patch of grass behind your house, or a park in your town you can visit every week, Stone says knowing an area well is the foundation of taking good photos. Often, people will ask Stone where he plans to go to take photos next, and he’ll tell them he doesn’t know— depending on what the sky is doing, what the light is like, what time of year it is, and what kind of wildlife will be around, he chooses right before he leaves.
Learn how time of day and weather changes the atmosphere of a place, and it will tell you where you should go on a given day. If you’re interested in wildlife photography, learn their habits: the migration patterns of local birds; the secret hiding spots for squirrels, rabbits, and foxes; the places where seals like to relax on the beach.
Two of the places that Stone knows best are Gooseberry Island and Allens Pond Wildlife Sanctuary in Westport, where many different habitats, ample wildlife, and the constantly-changing skies over outer Buzzards Bay provide a variety of photography opportunities. If you’re looking for an outdoor place in your neighborhood, we recommend browsing by town in our Places To Go feature.
2. Be sensitive to the light.
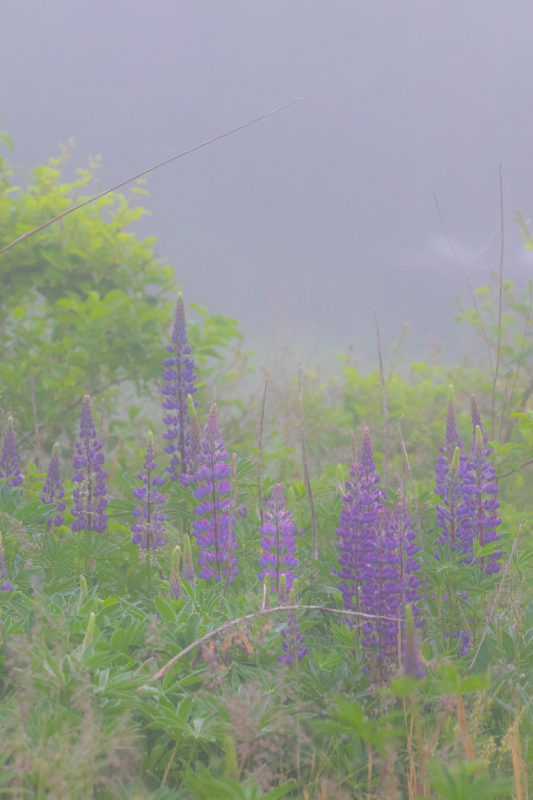
Cloudy and foggy days make colors stand out. (Image: Greg Stone)
Light is a photographer’s number one tool, and changing the lighting of a picture can completely change its impact. However, nature photographers face the difficult task of working in a setting where lighting can be unpredictable.
“For a nature photographer, you have to take advantage of the light you have; you can’t control what the lighting is, like a person in the studio,” says Stone. “So you have to be sensitive to the light and how it changes from hour to hour and season to season.”
Being sensitive to light connects closely to your knowledge of an area. If you know where to go, you can choose the light based on the photo you want to capture.
On a sunny day, you’ll get very strong shadows and bright highlights in direct sun, so a place with dappled shade might be a better choice — like the wooded wetlands of Carvalho Farm in Fairhaven, or beside the streams and ponds of Paskamansett Woods in Dartmouth. When it’s cloudy outside, light is more diffused and colors are softer, perfect for close-up photos of insects and wildflowers you can find in places like Old Aucoot District in Mattapoisett. At sunrise and sunset, look for wide-open skies mixed with features that can create depth (see tip #4!), like the rocky shoreline below Nobska Lighthouse in Falmouth or the reflective wetlands at Goldavitz Bog.
3. Let the camera do the work.
No matter the type of camera you use, Stone emphasizes that it’s too easy to get hung up on the technical side of your photo and forget about the content. Amateurs should start out with their camera or phone on its automatic setting, and focus on the process of creating the photo as you learn how the device works.
As you progress, slowly learn to use the major features of the camera one at a time, testing what they provide in different situations. One of Stone’s favorite features on point-and-shoot and DSLR cameras is the “shutter priority” setting. On this feature, the photographer only sets the camera’s shutter speed — how fast the camera opens and closes its lens, which defines how much light gets into a photo and how much moving objects blur. Greg recommends starting on 1/1000, which will allow you to catch everything from quick wildlife to crashing waves, and let the camera do the rest.
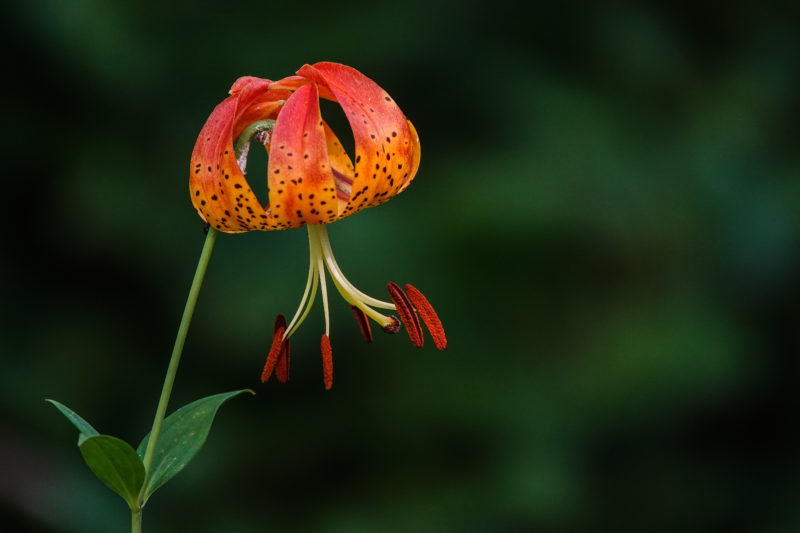
If you’re having trouble making a subject stand out, try finding a more uniform background, or moving closer so that the background blurs. (Image: Greg Stone)
4. Pay attention to the background.
“Too often people think of only the photo’s subject, they don’t think about how jumbled the background might be,” Stone says. A background with too much going on will distract from the subject of a photo, making it confusing and hard for the viewer to look at. To avoid this, try to frame your subject against negative space with a contrasting color: the sky, a calm ocean, or a neutral curtain of leaves.
If you’re having trouble with an overstimulating background, all you have to do is get closer to your subject — the closer you are, the more the background will fade into a blur.
5. Create depth.
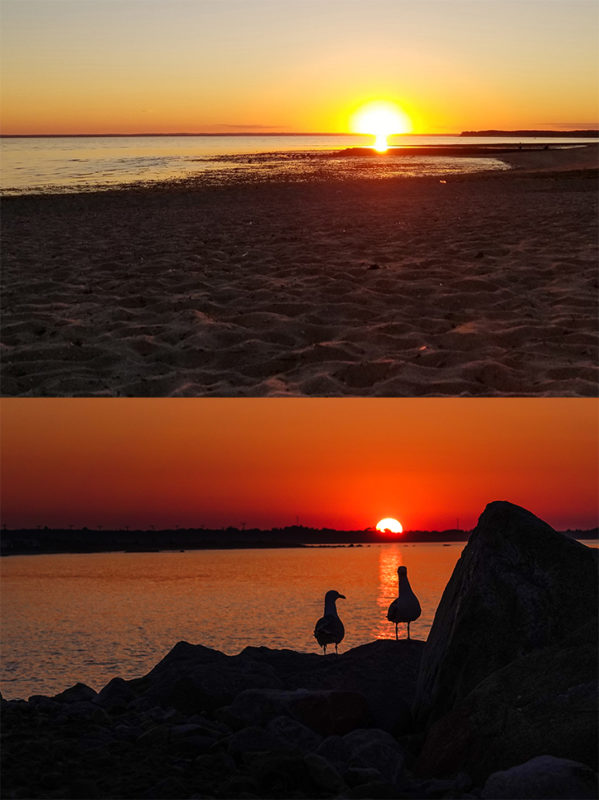
Take a look at the two sunset photos to the right. Which one do you find more interesting? If you picked the photo with the gulls, you’ve been captured by the effect of depth— a particularly important feature of good landscape photos. With any photo, you’re facing the challenge of changing a three-dimensional scene into a two-dimensional image, which is why landscapes that look extraordinary to your eye can turn out flat and unimpressive on a screen.
To ensure that your stunning sunrise or serene ocean really pops, include interesting objects into the foreground, mid-ground, and the background, creating what Stone calls a “dynamic landscape.” For example, wait for passing birds to dip in front of your sunset, or look for interesting stone structures to line up against ocean waves.
There’s another easy way to fulfill both this tip and tip #4: change your perspective.
6. Change your perspective.
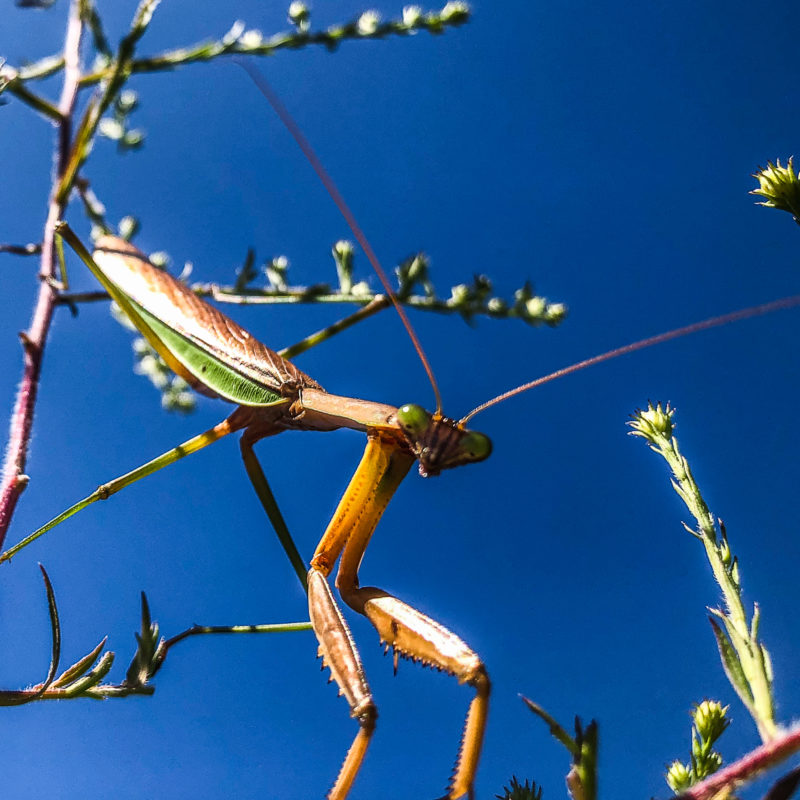
By moving his camera (in this case, his iPhone!) below this curious preying mantis, Stone framed him against a blue sky and give the photo a unique perspective. (Image: Greg Stone)
Every photographer starts off taking a photo at the same place: standing, at roughly the same height, with the camera pointed straight ahead — but as Stone says, “that can get boring.” The easiest way to make your photos more interesting is change up the angle.
Try crouching down low or putting the camera at the level of your subject, or looking up at it. If you’re working with bright light or a sunset, put the light behind your subject so that it’s silhouetted, or so that light shines through transparent objects like a raindrop or a thin leaf.
You can even make a subject stand out by giving it a nature-made frame, such as a gap between tall grasses or the square lines of a fence post. Take the time to experiment with a few different angles and frames, and then go back later to compare which one makes your photo “pop.”
7. Be patient!
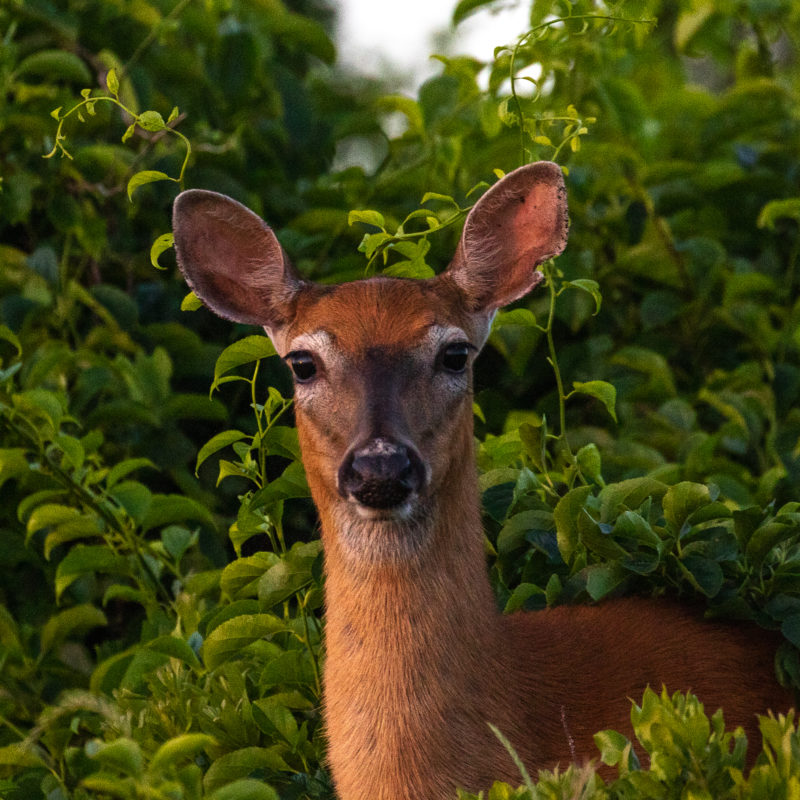
Capture images of shy animals, like this deer, by staying still and watching wildlife pass by. (Image: Greg Stone)
Stone’s start to serious photography was during his long nature walks through local parks, but he says, in reality, that wasn’t the best for good photography — by moving around too much, a photographer can startle wildlife, or miss how a landscape changes with shifting clouds or a setting sun. Instead, Stone says, “it’s a good idea to go someplace you think is a likely spot to see something and then wait.”
Looking for some places to get outside and practice these tips? Here are some of our favorite places for…
Stunning sunsets
- Moshup Beach (Aquinnah)
- Goosewing Beach Preserve & South Shore Beach (Little Compton)
- Ocean View Farm Reserve (Dartmouth)
- Fort Taber Park (New Bedford)
- Pope Beach (Fairhaven)
- Munro Preserve (Mattapoisett)
- Planting Island Beach (Marion)
- Swifts Neck Beach (Wareham)
- Bassets Island (Bourne)
- Old Silver Beach (Falmouth)
- Lookout Park (Cuttyhunk Island)
Spectacular sunrises
- P.T. Marvell Preserve (Little Compton)
- Emma Tripp Landing (Westport)
- Knowles Beach (Dartmouth)
- Munn Preserve (Mattapoisett)
- Silvershell Beach (Marion)
- Swifts Neck Beach (Wareham)
- Lawrence Island (Bourne)
- Nobska Lighthouse (Falmouth)
- Barges Beach (Cuttyhunk Island)
Fall foliage
- Simmons Mill Pond Management Area (Little Compton)
- Forge Pond Conservation Area (Westport)
- Cornell Farm (Dartmouth)
- The Sawmill (Acushnet)
- Aucoot Woods: White Eagle (Marion)
- The Bogs (Mattapoisett)
- East Over Reservation (Rochester)
- Long Pond & Falmouth Town Forest (Falmouth)
- Menemsha Hills (Chilmark)
Wildflowers & pollinators
- P.T. Marvell Preserve (Little Compton)
- Westport Woods Conservation Park (Westport)
- Parsons Reserve (Dartmouth)
- Flora B. Peirce Nature Trail (New Bedford)
- Hamlin Crossing (Acushnet)
- Hartley Reservoir Wildlife Management Area (Rochester)
- Old Aucoot District (Mattapoisett)
- Frances A. Crane Wildlife Management Area (Falmouth)
- Aquinnah Headlands Preserve (Aquinnah)
Wildlife photography
- Goosewing Beach Preserve (Little Compton)
- Dunham’s Brook Conservation Area (Westport)
- The Sawmill (Acushnet)
- Rocky Gutter Wildlife Management Area (Middleborough)
- Haskell Swamp Wildlife Management Area (Rochester)
- Great Neck Wildlife Sanctuary (Wareham)
- Red Brook Pond Conservation Area (Bourne)
- Frances A. Crane Wildlife Management Area (Falmouth)
- Penikese Island (Gosnold)